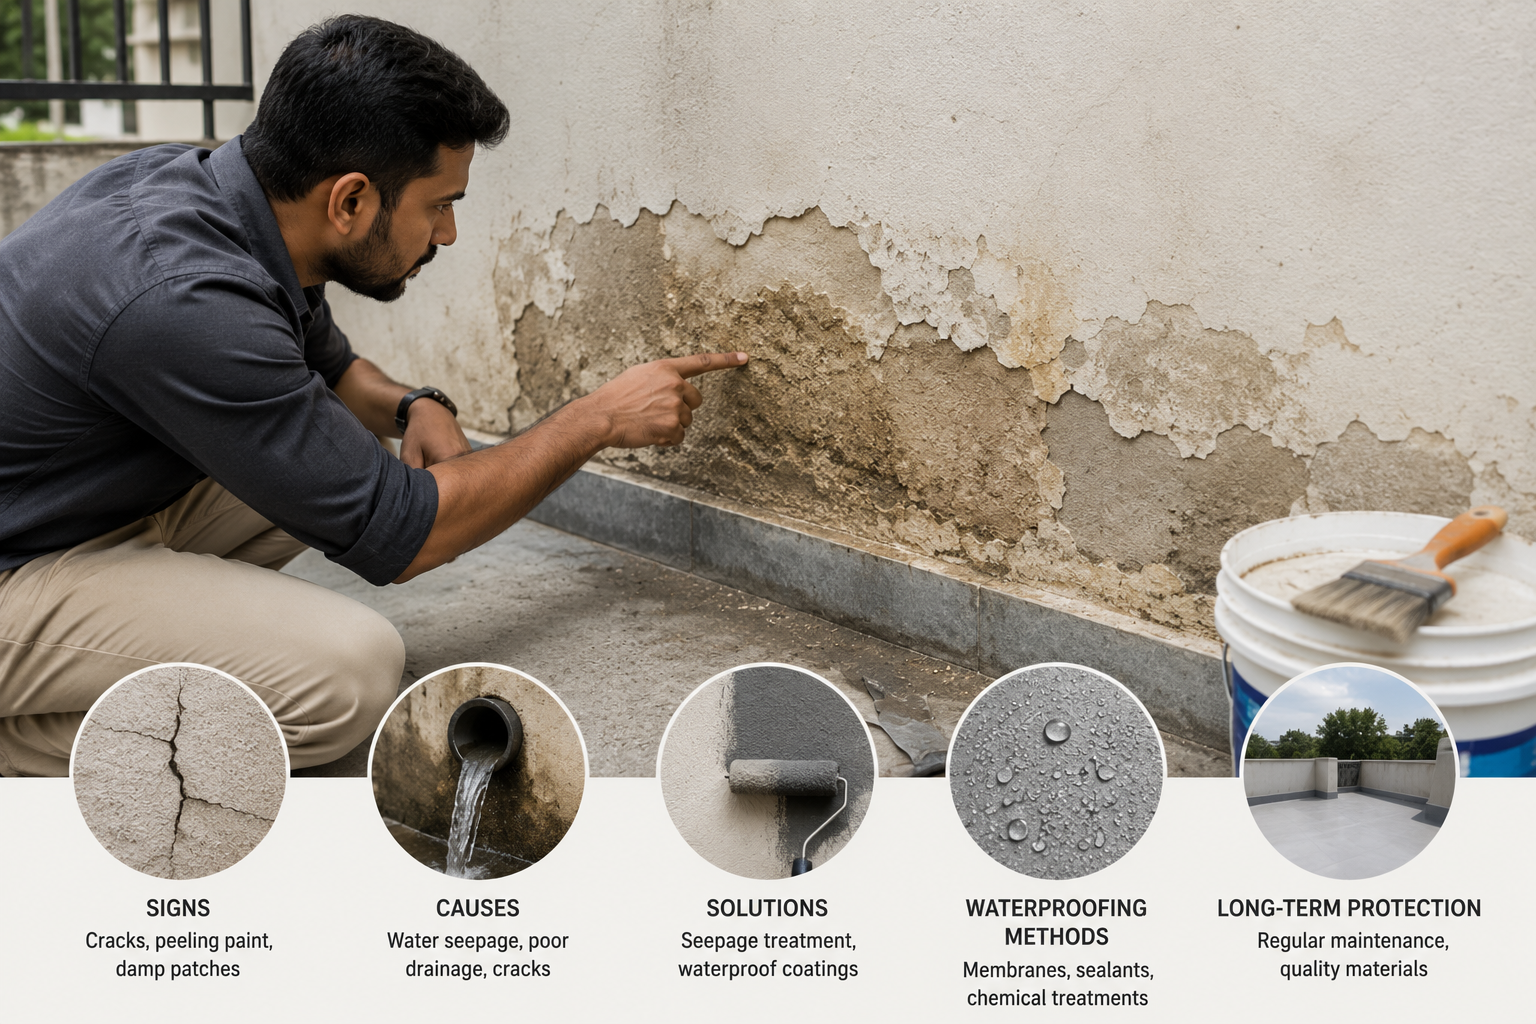
Your home is not just a structure. It is the result of years of hard work, emotional investment, and financial planning. And yet, one of the most damaging threats to that investment is something as simple as water finding its way inside. A small damp patch on the ceiling, a persistent musty smell in the bathroom, or paint peeling off a wall that was freshly done just last year ΓÇö these are not cosmetic issues. They are early warnings of a deeper problem that, if left unaddressed, can silently destroy the very structure you worked so hard to build.
Waterproofing is the answer. And not just the reactive kind where you call a contractor after the damage has already spread but the informed, proactive kind where you understand what is happening, why it is happening, and what actually works to stop it.
This guide covers everything you need to know about home waterproofing, written for homeowners who want real answers, not just product recommendations.
What Is Home Waterproofing and Why Does It Matter More Than You Think
Waterproofing is the process of applying water-resistant materials or systems to your home’s surfaces to prevent moisture from penetrating walls, floors, roofs, and foundations. It creates a protective barrier between your structure and water, whether that water comes from rainfall, groundwater, plumbing, or condensation.
Most homeowners think of waterproofing as a single task done during construction and then forgotten. The reality is quite different. Waterproofing is an ongoing responsibility. The materials degrade over time. Thermal expansion and contraction create micro-cracks. Monsoons stress every weak point. And in India, where the climate ranges from extreme heat to heavy rainfall within the same year, this stress on building materials is exceptionally high.
What makes water damage particularly dangerous is how quietly it progresses. By the time a crack appears in your ceiling or a wall starts crumbling, water has likely been working on the structure for months or even years. The visible damage is only the final stage of a process that started much earlier.
The structural risk is real. Concrete is porous by nature, and when moisture enters those pores, it reacts with the reinforcement steel inside. The steel corrodes, expands, and eventually cracks the concrete from within a process sometimes called concrete cancer. Once this begins, the cost of repair escalates dramatically compared to what prevention would have cost.
Beyond structure, there is a health dimension that often gets overlooked. Damp walls and ceilings are breeding grounds for mold. Species like Cladosporium, Aspergillus, and Stachybotrys thrive in moisture-rich environments and release spores into indoor air. These spores are linked to respiratory infections, skin irritation, allergic reactions, and in chronic cases, long-term lung damage. Children and elderly residents are especially vulnerable.
There is also an electrical safety angle. Water seeping into walls where electrical wiring runs is a genuine fire and shock hazard. Many household electrical incidents traced back to water infiltration never make the news, but they happen more often than people realise.
Finally, from a financial perspective, a well-maintained waterproofed home commands significantly higher resale value. Buyers inspect walls, bathrooms, and ceilings carefully. Signs of dampness, staining, or efflorescence are immediate red flags that bring down perceived value and negotiating power.
The Warning Signs You Should Never Ignore
Water damage rarely announces itself loudly. It starts small and grows slowly, which is why knowing the early signs matters so much.
Recurring damp patches on walls or ceilings are the most obvious sign. The key word here is recurring. Many homeowners repaint over a damp patch and consider it solved. If it comes back, the paint is not the problem water is entering from somewhere behind the surface and will keep returning until the entry point is sealed.
Paint that bubbles, blisters, or peels in specific spots is another indicator. This happens when moisture trapped beneath the paint surface pushes outward. It is not a paint quality issue. The same paint on a dry wall will last for years. On a wall with hidden seepage, no paint will hold for long.
A persistent musty smell especially in bathrooms, basements, or rooms on lower floors almost always points to mold growth. Mold can grow behind walls, under floors, and inside ceiling cavities where it cannot be seen but its spores spread freely into the living space.
Efflorescence, those white chalky or powdery deposits on walls, floors, or around basement walls, is a chemical sign. It happens when water moves through a concrete or masonry surface, picks up soluble mineral salts, and deposits them as it evaporates. It confirms that water is actively travelling through your walls.
Horizontal cracks deserve special attention. Vertical cracks are relatively common in buildings they often result from normal settlement or thermal movement. Horizontal cracks, particularly in basement walls or load-bearing walls, signal hydrostatic pressure or structural distress and should be evaluated by a professional without delay. They are also natural entry points for water.
Doors and windows that suddenly stick, warp, or refuse to close properly often indicate moisture absorption in wooden frames. This is a less obvious but reliable sign of dampness in the surrounding wall or floor structure.
Rust stains on a ceiling or on the underside of a roof slab are serious. They indicate that the reinforcement steel inside the concrete is corroding meaning water has already reached the structural layer. This is beyond cosmetic and requires urgent attention.
Understanding Where the Water Actually Comes From
Identifying the source of water infiltration is more complex than it seems, because the point where damage appears and the point where water enters are often not the same place.
Roofs and terraces are the most common source in Indian homes. Flat roofs, which are standard across most of the country, accumulate water during monsoon. Without adequate slope, water pools. Without a proper waterproofing membrane, it finds cracks at joints, parapet wall junctions, drainage outlets, and around any protrusions like AC pipes or utility conduits. The water that enters at the roof slab level can travel laterally and show up as a damp patch or crack several feet away from the actual entry point.
Foundations and basements deal with a different kind of pressure. Hydrostatic pressure is the force exerted by water-saturated soil against underground walls and floors. If the drainage around your foundation is inadequate, or if the land around the building slopes toward the structure rather than away from it, water accumulates and pushes inward. This is how basements develop seepage even without obvious cracks water under pressure forces itself through porous concrete.
External walls face constant lateral exposure to rain, especially in coastal cities and areas that experience driving rain. If the exterior plaster is of poor quality, if the waterproof coating has degraded, or if window and door frames have lost their sealant, rainwater can penetrate directly through the wall surface.
Bathrooms and kitchens are internal sources that often go undetected for a long time. Grout between tiles degrades over years of use. Tile adhesive weakens. Hairline cracks develop in the tile layer. Water from daily use seeps through these gaps and sits on the floor slab beneath the tiles eventually working its way down to the ceiling of the room below. This is one of the most common causes of ceiling stains in multi-floor homes.
Concealed plumbing leaks are another hidden source. Pipes that run inside walls or beneath floors can develop slow leaks that wet the surrounding material for months. The wall surface stays moist, paint peels, and mold grows, but without breaking open the wall it is difficult to identify the exact source.
Condensation is frequently mistaken for seepage, particularly in basements and poorly ventilated rooms. When warm humid air meets a cooler surface like a concrete wall or floor, it condenses into droplets. Over time, this creates the same moisture problems as external seepage and needs to be addressed through ventilation and sometimes interior waterproofing.
Area-by-Area Waterproofing: What Each Zone Needs
Every part of the home has different waterproofing requirements, and treating them the same way leads to failure.
Roof and Terrace: This is the highest priority area in any Indian home. The flat roof is the first line of defence against monsoon and also deals with extreme thermal cycling temperature swings of 40 to 50 degrees Celsius between day and night during summer are not unusual in many Indian cities. This constant expansion and contraction creates stress on any material applied to the surface.
Effective roof waterproofing begins with proper surface preparation removing all loose material, filling cracks and gaps, levelling uneven areas, and ensuring drainage outlets are clear. The waterproofing membrane is then applied, typically an elastomeric liquid membrane or a bituminous coating. Corners, joints, parapet junctions, and any penetrations need extra layers and special treatment. A heat-reflective top coat can reduce surface temperature by 6 to 8 degrees Celsius, which makes a noticeable difference in indoor comfort and also reduces the thermal stress on the waterproofing system itself.
Slope matters as much as the membrane. Even the best waterproofing system will be compromised if water is allowed to pool on the terrace. A minimum gradient of 1:50 is the standard recommendation to ensure water drains toward outlets rather than sitting on the surface.
External Walls: In a climate where monsoon rains can be both heavy and wind-driven, external walls take significant punishment. Moisture can also rise from the ground through capillary action in older buildings without proper damp-proof courses.
External wall waterproofing involves applying an elastomeric or acrylic-based coating that forms a flexible, water-resistant film on the surface. This film stretches slightly to accommodate thermal movement and bridges small surface cracks. For walls showing rising dampness, the approach involves treating the lower sections with a crystalline or cementitious waterproofing product that actually penetrates the concrete and blocks water movement at the pore level.
Interior walls that are below grade, adjacent to a basement, or showing internal dampness need a cement-polymer based waterproof coating on the inside surface, typically in conjunction with whatever exterior treatment is applied.
Bathrooms and Wet Areas:- Bathrooms are where internal waterproofing matters most, and they are also where it is most often skipped or done poorly. The proper approach is to apply a flexible waterproofing membrane beneath the tile layer, covering the entire floor and extending up the walls to a height of at least 300 millimeters and around the full perimeter of a shower area. Corners and junctions between wall and floor are the most vulnerable points and need reinforcing fabric tape embedded in the waterproofing layer.
When this is done correctly during construction, the tile layer above is simply a finish material. The waterproofing below does all the work of keeping water where it belongs. When this step is skipped or done minimally, tile grout deterioration over 5 to 7 years opens up pathways for water to reach the structural slab.
Kitchen: The kitchen is a higher-risk area than most homeowners account for. The counter area around the sink, the wall behind the cooking range, under-counter cabinet bases, and any area where plumbing penetrates walls are all points of potential moisture ingress. Anti-fungal waterproof coating around the sink area, careful attention to grouting and sealant around fittings, and ensuring that plumbing connections are properly sealed will handle most kitchen waterproofing needs.
Basement: Basement waterproofing is the most technically complex area and has four distinct methodological approaches depending on the source and nature of the moisture problem.
Interior sealants work by coating the inside surface of basement walls and floors with a penetrating or film-forming waterproof product. This is useful for minor seepage and condensation but does not address the root cause of pressure-driven infiltration.
Exterior waterproofing involves excavating the soil around the foundation, applying a waterproof coating or membrane to the outside of the foundation walls, and installing a drainage layer to direct water away from the structure. This is the most comprehensive and permanent solution but also the most expensive and disruptive, especially in an existing home.
Interior drainage systems take a different approach rather than preventing water from entering, they manage water that does enter by channelling it to a sump pit and pumping it out. This method is particularly effective when condensation is the primary moisture source and works well as part of a comprehensive basement management strategy.
Foundation crack injection uses polyurethane or epoxy resins injected directly into cracks in the foundation wall. The material expands to fill the crack completely and cures to form a waterproof, flexible seal. This is a targeted solution for identifiable cracks and is quicker and less invasive than exterior excavation.
Water Tanks and Overhead Tanks: Waterproofing for potable water storage requires specific food-grade safe products. Standard waterproofing coatings used for roofs or walls contain compounds that are not safe for contact with drinking water. Cementitious waterproofing products formulated for water tanks are non-toxic, have zero VOC, and create a durable lining that prevents both leakage outward and contamination inward. Annual inspection of water tank waterproofing is important given the health implications.
Foundation: Foundation waterproofing is almost exclusively a new construction task. Once a building is complete, accessing the exterior surface of the foundation requires significant excavation. During construction, applying a waterproof membrane or coating to the foundation before backfilling is a standard good practice, especially in areas with high groundwater tables or significant rainfall. It prevents rising dampness where groundwater wicks upward through the foundation and into ground floor walls ΓÇö and protects the foundation from chemical attack by soil minerals.
The Five Main Waterproofing Methods Compared
Different waterproofing situations call for different solutions. Understanding the broad categories helps you have a more informed conversation with a contractor or consultant.
Cementitious waterproofing is the most accessible option a mixture of cement, sand, and chemical additives that is applied like a slurry or mortar. It is easy to use, cost-effective, and widely available. It is best suited for new construction applications in basements, water tanks, and wet rooms. It is not flexible, which means it performs less well in areas subject to significant thermal movement.
Liquid waterproofing membranes, particularly elastomeric systems, are applied by brush or roller and dry to form a seamless, flexible film. They can bridge small cracks and accommodate thermal movement without cracking. They are the standard choice for roof and terrace waterproofing in India. The quality of the product and the number of coats applied are critical to long-term performance.
Bituminous coatings are petroleum-based products with excellent waterproofing properties in below-grade applications. They are commonly used on foundations, retaining walls, and underground structures. They degrade when exposed to UV light, so a protective top coat is required wherever the surface is exposed to sunlight.
Elastomeric coatings are a category of flexible polymer-based products that combine waterproofing with durability and weather resistance. They are used on roofs, external walls, and anywhere that requires both water resistance and the ability to handle thermal expansion. Heat-reflective elastomeric coatings are an increasingly popular choice for terraces.
Polyurethane liquid membranes represent the premium end of the waterproofing spectrum. They have the highest elongation and flexibility, excellent chemical resistance, and can last 15 to 20 years with proper maintenance. They are used in high-performance applications like parking decks, podium slabs, and commercial roofing, but are increasingly being specified for high-value residential projects.
What a Professional Waterproofing Job Actually Involves
Understanding the process helps you verify whether a contractor is doing the work properly.
A professional waterproofing job starts with a thorough inspection. An experienced applicator will identify all sources of moisture, not just the most obvious one. Moisture meters, visual inspection of cracks and joints, and sometimes simple flood or ponding tests are used to understand the extent of the problem.
Surface preparation is the step that most directly determines whether the waterproofing will hold. Every trace of loose material, efflorescence, algae, oil, or dust must be removed. Cracks are cut open, filled with repair mortar or polyurethane filler, and allowed to cure. The surface must be dry applying waterproofing over a damp surface is one of the most common reasons for premature failure.
Priming improves adhesion between the substrate and the waterproofing layer. Some products are self-priming, but most perform better with a dedicated primer coat allowed to dry fully before the main application.
The waterproofing material is then applied in the specified number of coats, following the manufacturer’s instructions for coverage rate and drying time between coats. Critical details corners, joints, junctions, and any penetration receive reinforcing treatment, often with fabric mesh embedded in the first coat.
Curing time is non-negotiable. Rushing through this stage compromises the final performance of the system. The coating needs adequate time to form its full mechanical and waterproofing properties before being exposed to water.
A water ponding test on the completed roof surface keeping water ponded for 24 to 48 hours is the standard verification method to confirm that no water is passing through before the job is signed off.
More:- https://designunfiltered.com/
The Honest Answer on DIY Versus Professional Waterproofing
For very small repairs ΓÇö filling a hairline crack in a bathroom tile joint, resealing around a window frame, or applying a touch-up coat to a small section of terrace a motivated homeowner with the right materials can get reasonable results.
For anything larger than that, professional application is strongly recommended. The reasons are practical, not commercial. Product quality accounts for only a part of waterproofing performance. Application technique, surface preparation quality, correct coverage rates, and the sequencing of different materials all matter enormously. The same product applied by an experienced applicator versus an untrained one will produce significantly different results.
Professional waterproofing also comes with a warranty typically 5 to 10 years depending on the system and the contractor. If the waterproofing fails within that period, there is recourse. With DIY, every failure is entirely your own problem to solve.
The misconception is that professional waterproofing is always significantly more expensive. When you factor in the cost of materials, the time involved, the risk of needing to redo poorly applied work, and the absence of any warranty protection, professional application is usually the better financial decision, not just the easier one.
Do’s and Don’ts That Actually Matter
Always identify the source of moisture before attempting any repair. Covering a symptom without fixing the cause is a waste of money.
Always use the right product for the specific application. A roof coating is not appropriate for a water tank. A bathroom membrane is not the same as a foundation treatment. The product categories exist for good reasons.
Always allow proper drying and curing time. This step is most often cut short due to schedule pressure and is responsible for a disproportionate share of waterproofing failures.
Keep gutters and drainage outlets clear. A clogged drain on a flat roof is one of the fastest ways to cause water damage the ponding water that results will find any weakness in the waterproofing system.
Never apply waterproofing over a wet or damp surface. The bond will be compromised from the start.
Never plant trees or large shrubs close to the building foundation. Root systems cause physical cracking and create pathways for water. Keep significant vegetation at least 3 metres from the building perimeter.
Never accept a quick cosmetic fix as a substitute for addressing the actual problem. Repainting over a damp patch without treating the source will always result in the same problem recurring, usually worse.
Do not mix waterproofing systems or products from different manufacturers without expert guidance. Compatibility issues can cause adhesion failure or chemical reactions that compromise the entire application.
Maintaining What You Have Protected
Good waterproofing does not maintain itself. A simple annual routine protects the investment you have made in a proper waterproofing system.
Before every monsoon, take 30 minutes to inspect the terrace surface for cracks, check that drainage outlets are clear, look at window and door sealants for any cracking or shrinkage, and check exterior wall surfaces for any new peeling or staining.
During heavy rainfall events, check low-lying areas ΓÇö the basement, ground floor walls, and ceiling below the roof for any new signs of moisture. If something appears, document it and address it promptly rather than waiting until after the rain season.
After the monsoon ends, do a full assessment. New cracks, new staining, or recurring damp patches should be investigated rather than painted over.
Every two to three years, have a professional inspect bathroom waterproofing integrity, especially in older homes where the original installation may be approaching the end of its useful life.
Every five to ten years, have a comprehensive review of all waterproofing systems across the building. Some components will need reapplication or upgrading, and identifying these proactively is far less expensive than dealing with the damage from a system that has failed unnoticed.
FAQs
When is the right time to waterproof a home?
The ideal time is during construction, when all surfaces are accessible and waterproofing can be integrated properly into the build. For existing homes, the pre-monsoon window between March and May gives surfaces time to dry after winter and allows newly applied waterproofing to cure before the rains arrive. However, if you are seeing active signs of water infiltration, the season is less important than acting quickly. Ongoing water damage compounds over time.
Can I waterproof my home myself?
For small, isolated repairs, yes. For any significant area a full terrace, a bathroom, an external wall, or a basement the risks of DIY application outweigh the cost savings. Poor surface preparation, incorrect product selection, wrong coverage rates, and missed critical junctions are common DIY failures. Professional application with a warranty is more cost-effective when the total picture is considered.
How long does waterproofing last?
This depends on the product system used, the quality of application, and the conditions the surface faces. A well-applied elastomeric roof membrane in good condition can last 10 to 15 years. Cementitious systems in sheltered applications can last longer. Bathroom waterproofing that handles daily use typically needs attention after 8 to 12 years. The practical answer is: inspect every two to three years, act on any signs of compromise, and plan for a full review every five to ten years rather than waiting for visible failure.